Simple Solutions for Common Hardware Issues
Computers are essential to modern life, but like any technology, they aren’t immune to malfunctions. Many common hardware problems can be intimidating, but you don’t always need a professional to fix them. With the right tools, a bit of patience, and this guide, you can perform many computer repairs on your own.
This article provides step-by-step solutions for the most common hardware issues, empowering you to handle them confidently without breaking the bank.
Getting Started: Tools and Precautions
Essential Tools for DIY Computer Repair
Before you dive into repairs, gather these basic tools:
- Screwdrivers: A set of small Phillips and flathead screwdrivers for opening the case and securing parts.
- Anti-static Wrist Strap: Protects sensitive components from electrostatic discharge.
- Compressed Air Canister: Cleans dust from internal components.
- Thermal Paste: Used when reinstalling or replacing a CPU.
- Flashlight: Illuminates hard-to-see areas inside the case.
Precautions Before Repairing
- Backup Data: Save important files to an external drive or cloud storage.
- Power Off and Unplug: Disconnect the computer from all power sources to avoid electric shock.
- Ground Yourself: Wear an anti-static wrist strap or regularly touch a grounded metal object to discharge static electricity.
- Organize Screws: Use a small tray or magnetic mat to keep track of screws.
With the tools and precautions in place, let’s dive into the most common hardware issues and how to fix them.
1. Slow or Unresponsive Computer
Symptoms
- Sluggish performance.
- Applications take a long time to load or respond.
- Frequent freezing.
Possible Causes
- Dust buildup causing overheating.
- Insufficient RAM or storage.
- Failing hard drive.
DIY Solutions
- Clean Internal Components:
- Use compressed air to remove dust from the CPU, GPU, and fans.
- Ensure airflow isn’t obstructed by repositioning cables.
- Upgrade RAM:
- Identify the type of RAM your motherboard supports.
- Open the case, locate the RAM slots, and insert the new module firmly until it clicks.
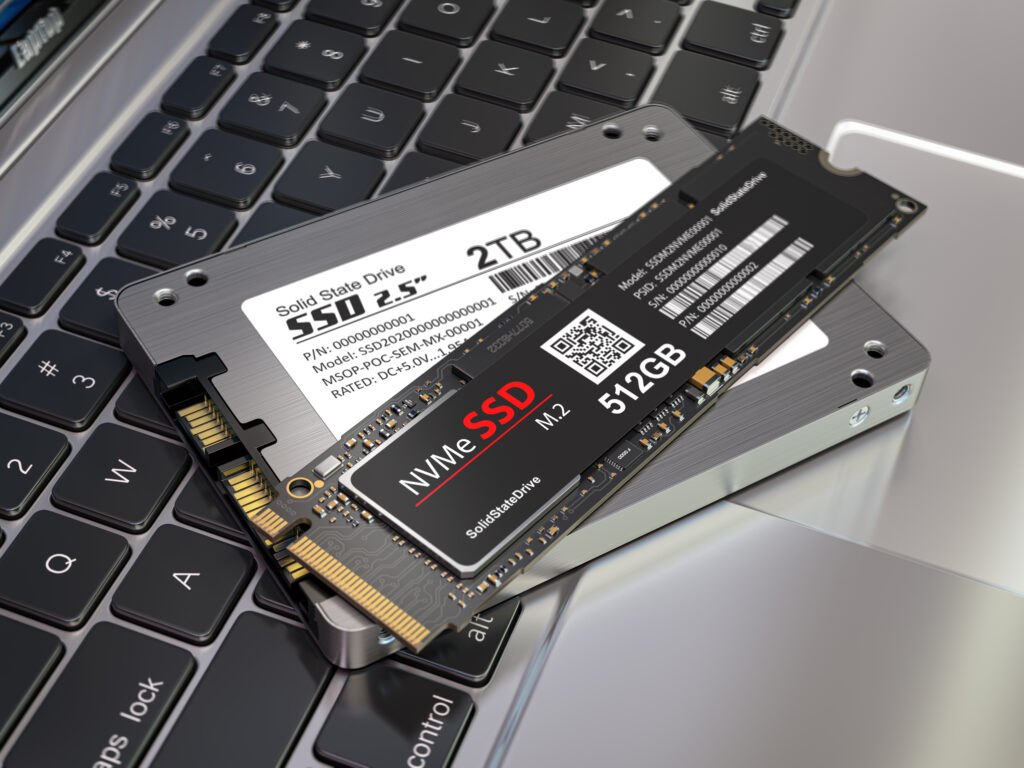
- Upgrade to an SSD:
- Replace your old hard drive with a solid-state drive (SSD) for faster performance.
- Clone your existing drive to the SSD using free cloning software.
2. Computer Won’t Turn On
Symptoms
- No power light or fan activity.
- No response when pressing the power button.
Possible Causes
- Faulty power supply unit (PSU).
- Loose or disconnected cables.
- Dead motherboard or CPU.
DIY Solutions
- Check Power Supply:
- Ensure the power cable is securely connected to the wall outlet and PSU.
- Test the outlet with another device to confirm it’s working.
- Inspect Cables and Connections:
- Open the case and verify that all cables are firmly connected, especially the 24-pin and 8-pin motherboard connectors.
- Test the PSU:
- Use a PSU tester or multimeter to confirm the PSU is supplying power.
- Replace the PSU if it fails the test.
- Reset the CMOS:
- Remove the CMOS battery for 5 minutes to reset the motherboard’s BIOS.
3. Overheating and Unexpected Shutdowns
Symptoms
- Sudden shutdowns during heavy usage.
- High-pitched fan noise.
- CPU or GPU temperatures exceeding safe limits.
Possible Causes
- Dust blocking airflow.
- Dried or improperly applied thermal paste.
- Malfunctioning fans.
DIY Solutions
- Clean the Fans and Heatsinks:
- Use compressed air to remove dust from the CPU and GPU fans.
- Clean the heatsink fins for better heat dissipation.
- Replace Thermal Paste:
- Remove the CPU heatsink and clean the old thermal paste using isopropyl alcohol.
- Apply a pea-sized amount of new thermal paste and reattach the heatsink.
- Check and Replace Fans:
- Test the fans for functionality.
- Replace malfunctioning fans with compatible replacements.
4. No Display on Monitor
Symptoms
- Monitor shows “No Signal” message.
- Blank screen even though the computer is powered on.
Possible Causes
- Loose or damaged video cable.
- Faulty GPU.
- Incorrect input source selected on the monitor.
DIY Solutions
- Verify Monitor Connections:
- Check that the HDMI, DisplayPort, or VGA cable is securely connected to both the computer and the monitor.
- Test the cable with another device to ensure it’s functional.
- Check the GPU:
- Remove the GPU and reseat it in the PCIe slot.
- Test the GPU in another system, or use the motherboard’s integrated graphics to determine if the GPU is faulty.
- Reset Display Settings:
- Boot into Safe Mode and update or reinstall GPU drivers.
5. Strange Noises from the Computer
Symptoms
- Clicking, grinding, or buzzing sounds.
- Noise increases during operation.
Possible Causes
- Failing hard drive.
- Malfunctioning fans.
- Loose components vibrating.
DIY Solutions
- Inspect the Hard Drive:
- Back up data immediately if you suspect the hard drive is failing.
- Replace the hard drive and reinstall the operating system.
- Check Fans for Damage:
- Look for bent fan blades or debris obstructing the fan.
- Replace damaged fans.
- Secure Loose Components:
- Tighten screws and secure cables that may be causing vibrations.
6. Keyboard or Mouse Not Responding
Symptoms
- Keyboard or mouse doesn’t function, even when plugged in.
- Certain keys or buttons don’t work.
Possible Causes
- Faulty USB ports.
- Damaged or dirty peripherals.
DIY Solutions
- Test USB Ports:
- Plug the keyboard or mouse into another USB port.
- Test the device on another computer to confirm functionality.
- Clean the Devices:
- Use compressed air to remove debris from the keyboard.
- Clean the mouse sensor with a soft, dry cloth.
- Replace or Repair Peripherals:
- For mechanical keyboards, replace damaged key switches.
- Consider replacing the device if repairs aren’t feasible.
7. Hard Drive Not Detected
Symptoms
- BIOS or operating system doesn’t recognize the hard drive.
- Drive is missing from “My Computer” or “This PC.”
Possible Causes
- Loose SATA or power cables.
- Corrupted drive firmware.
- Failing hard drive.
DIY Solutions
- Check Connections:
- Open the case and ensure the SATA and power cables are securely connected to the drive and motherboard.
- Test with Another Port or Cable:
- Swap the drive to another SATA port or use a different cable.
- Run Diagnostics:
- Use tools like CrystalDiskInfo to check the health of the drive.
- Replace the drive if diagnostics indicate failure.
8. USB Ports Not Working
Symptoms
- USB devices aren’t detected.
- No power to connected devices.
Possible Causes
- Corrupted USB drivers.
- Damaged USB ports.
DIY Solutions
- Inspect the Ports:
- Check for visible damage or debris inside the USB ports.
- Use compressed air to clean the ports.
- Update USB Drivers:
- Open Device Manager, locate the USB controllers, and update the drivers.
- Test Motherboard Header:
- Verify that the internal USB headers are connected securely to the motherboard.
- Use a PCIe USB Expansion Card:
- If the motherboard ports are damaged, install a PCIe USB expansion card as a workaround.
Preventative Maintenance for Computer Hardware
Preventing hardware issues is easier and less expensive than fixing them. Incorporate these practices into your routine to keep your computer in top shape:
- Regular Cleaning:
- Clean dust from fans, vents, and components every 3–6 months.
- Monitor Temperatures:
- Use tools like HWMonitor to keep an eye on CPU and GPU temperatures.
- Update Drivers and Firmware:
- Regularly update device drivers and BIOS/UEFI firmware for optimal performance.
- Proper Shutdown Procedures:
- Always use the operating system’s shutdown feature to avoid corrupting files.
- Invest in Surge Protection:
- Use a surge protector or Uninterruptible Power Supply (UPS) to safeguard your computer from power fluctuations.
When to Seek Professional Help
While many hardware issues can be resolved at home, some problems require professional intervention:
- Persistent issues after multiple repair attempts.
- Signs of motherboard or CPU failure.
- Data recovery from damaged drives.
- Custom repairs involving soldering or advanced diagnostics.
Final Thoughts
DIY computer repair can save you time and money while giving you valuable insight into how your system works. By following the simple solutions outlined in this guide, you can address common hardware issues with confidence.
Remember to work carefully, stay organized, and take proper precautions to protect both yourself and your computer. If the problem persists or feels too complex, don’t hesitate to consult a professional for assistance.